
If you're someone who frequently networks, you've likely encountered people swapping digital business cards instead of the traditional paper ones. It's a smart, modern way to make connections, and you might be wondering how they do it—and more importantly, how you can too. Well, you're in the right place…
Here's how to do it:
This guide will use the Social Card app from the App Store to simplify and centralize the process of creating your new digital business card for your iPhone. The great part about Social Card is it creates business cards that integrate directly with the Apple Wallet on all your iOS devices. Now, you could probably do this using various tools, but that can get a bit cumbersome—especially when your goal is to quickly get your card out there and start networking. With the app, it's quick and easy, and you'll have a professional card ready to share in no time. Plus, you can start for FREE, and updating your information later is a breeze.
Step 1: Download and Set Up Social Card
- Download the app: Available on the app store as Social Card.
- Sign Up or Log In: Open the app, sign up, or log in with your existing account.
- Add your networking info: Add your personal and work details along with a professional headshot. These can be used to auto-fill your new business card.
Step 2: Create Your Digital Business Card
- Create your card: From the home screen, click the Add Card button to get started.
- Follow the on-screen prompts: When asked for a starting point, I recommend selecting the Use my profile option. This will speed things up by applying your previously added profile info as a default.
Step 3: Customize Your Digital Business Card
- Add Front Fields: These fields appear on the front of your card, much like you'd see on a paper business card. This space is great for basics like your name, email, and job title. These fields aren't shared, so you can put whatever information you'd like here. Get creative!
- Preview: See the progress on your card by clicking the Preview button in the top right.
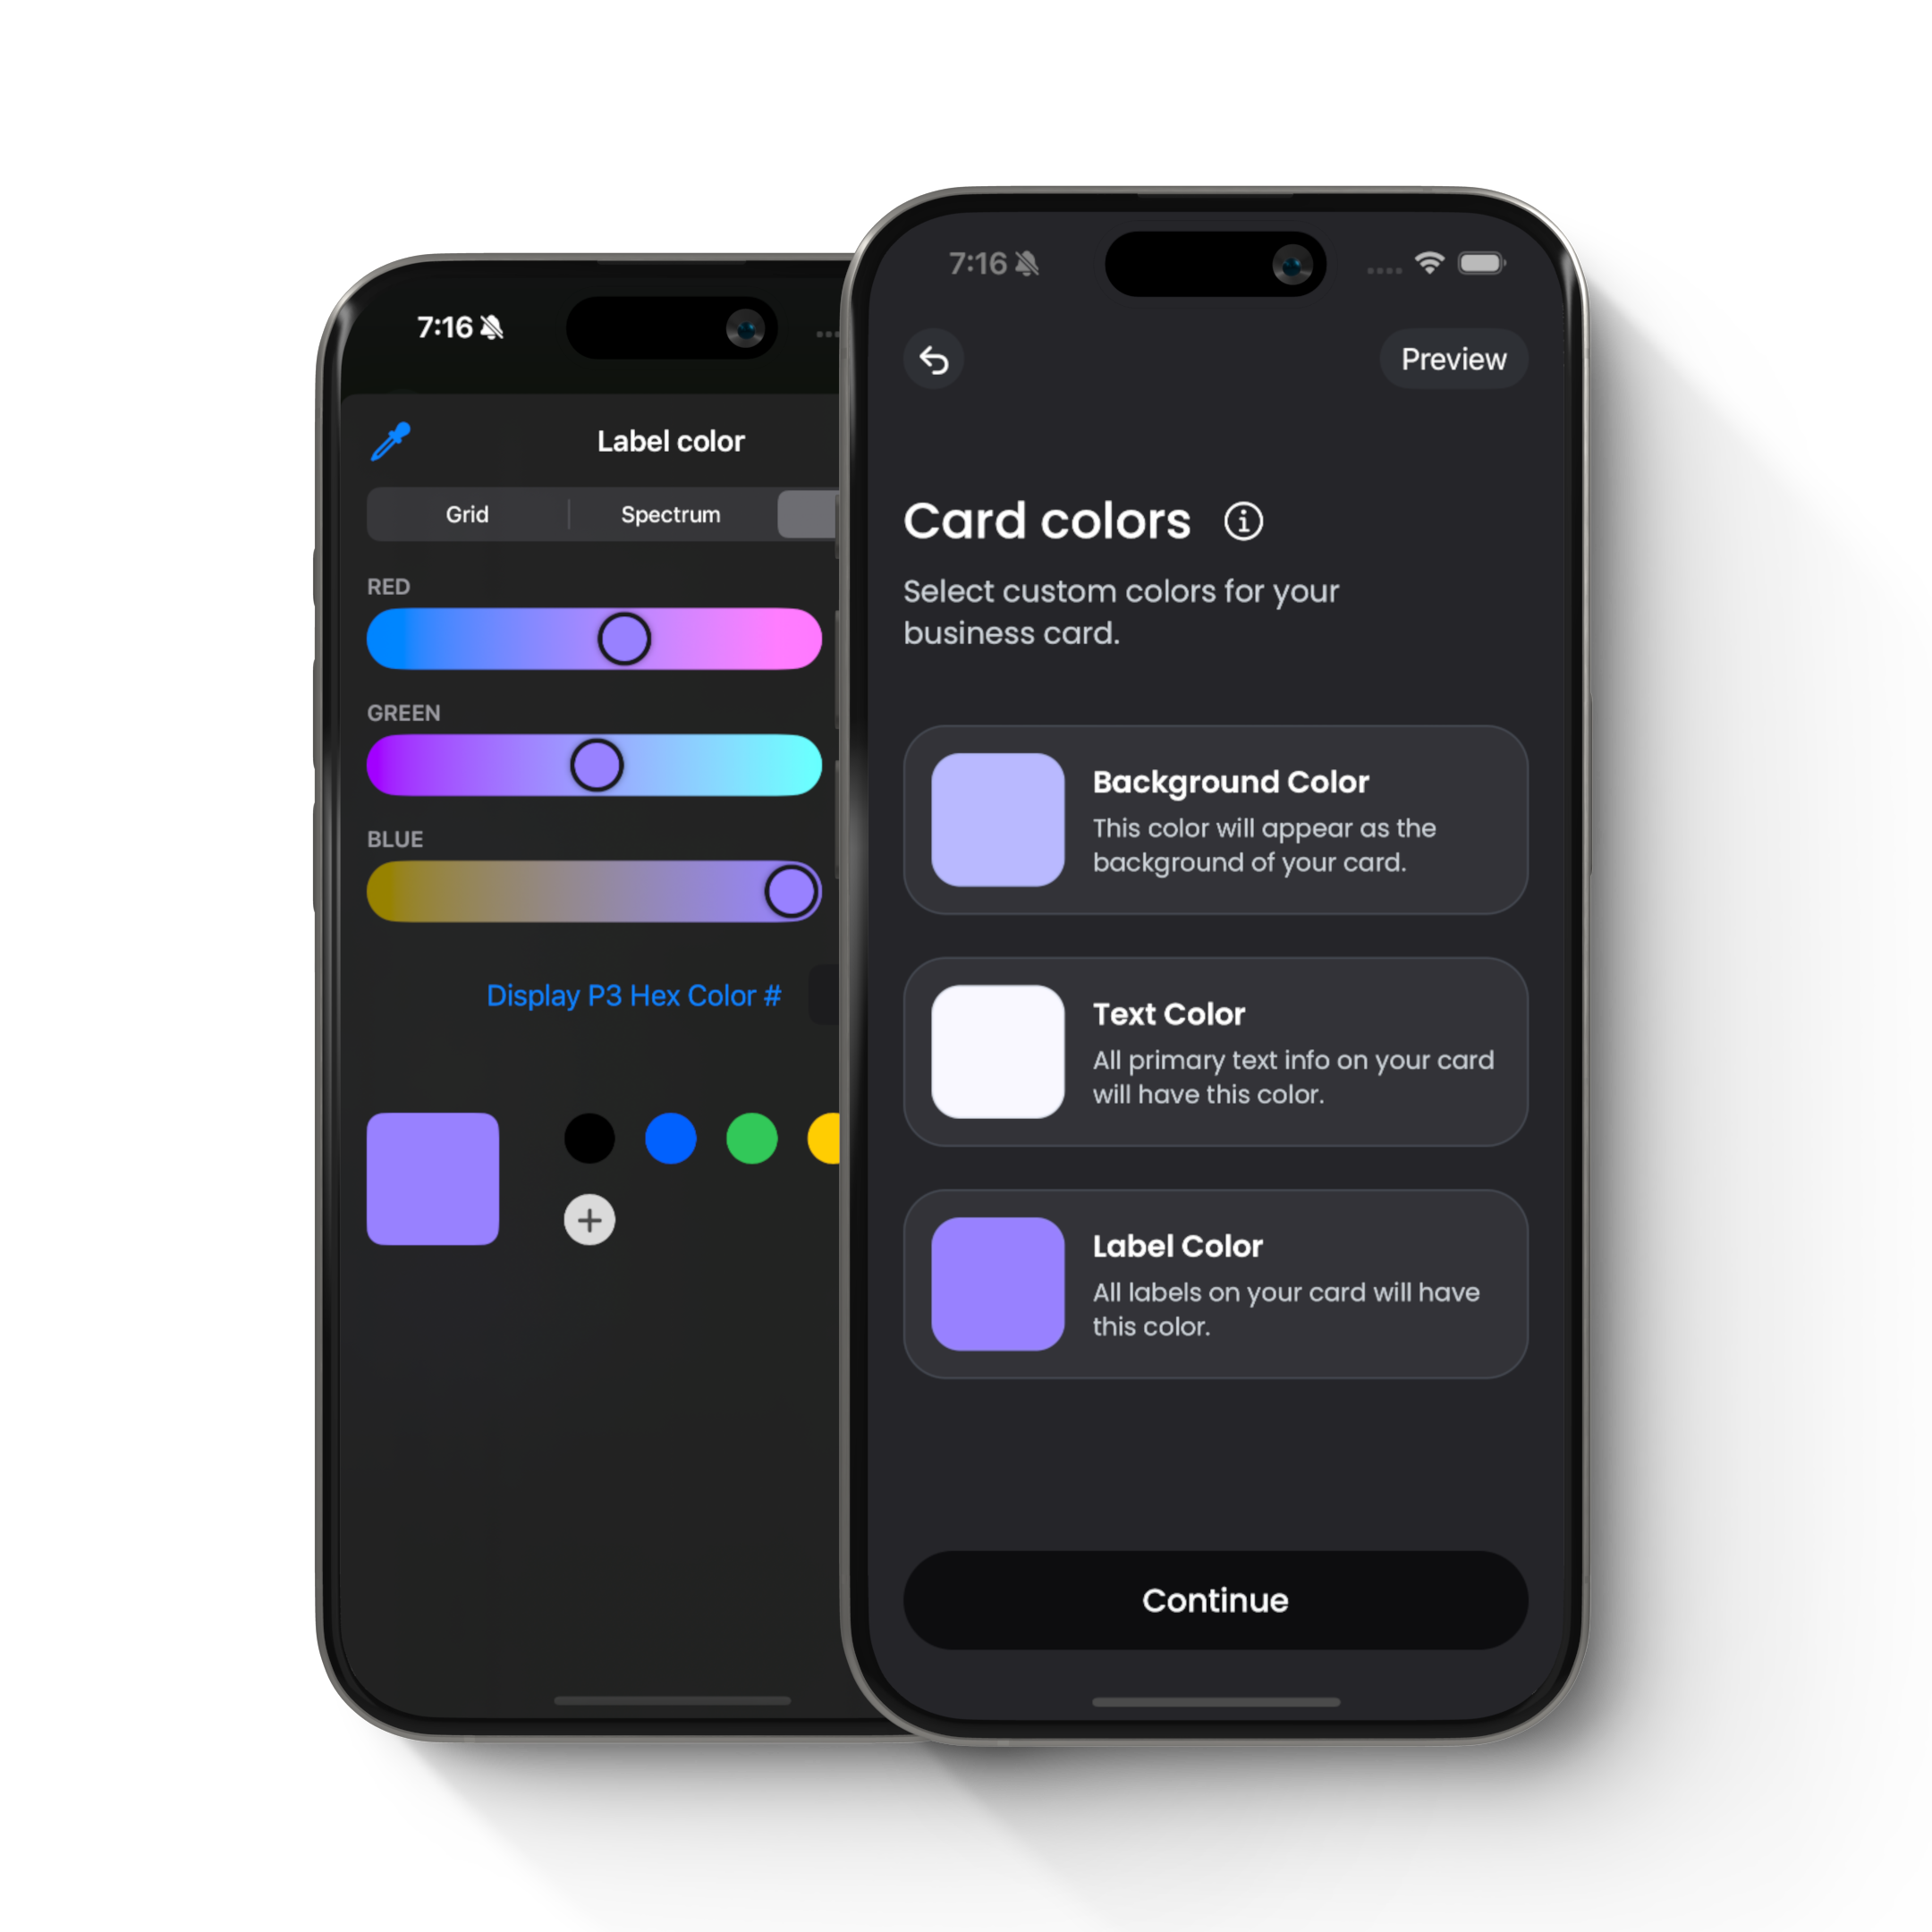
- Add Colors: You can add your company brand colors or use your personal favorite colors. Click each of the existing color options to edit them. Upgrading to a premium card lets you add your own colors using an advanced color picker.
- Add media: Upload your photo—a picture is worth 1000 words, they say! If you've upgraded to a premium card, you can also upload a logo in this step.
Remember to check out the preview to make sure things are pixel-perfect!
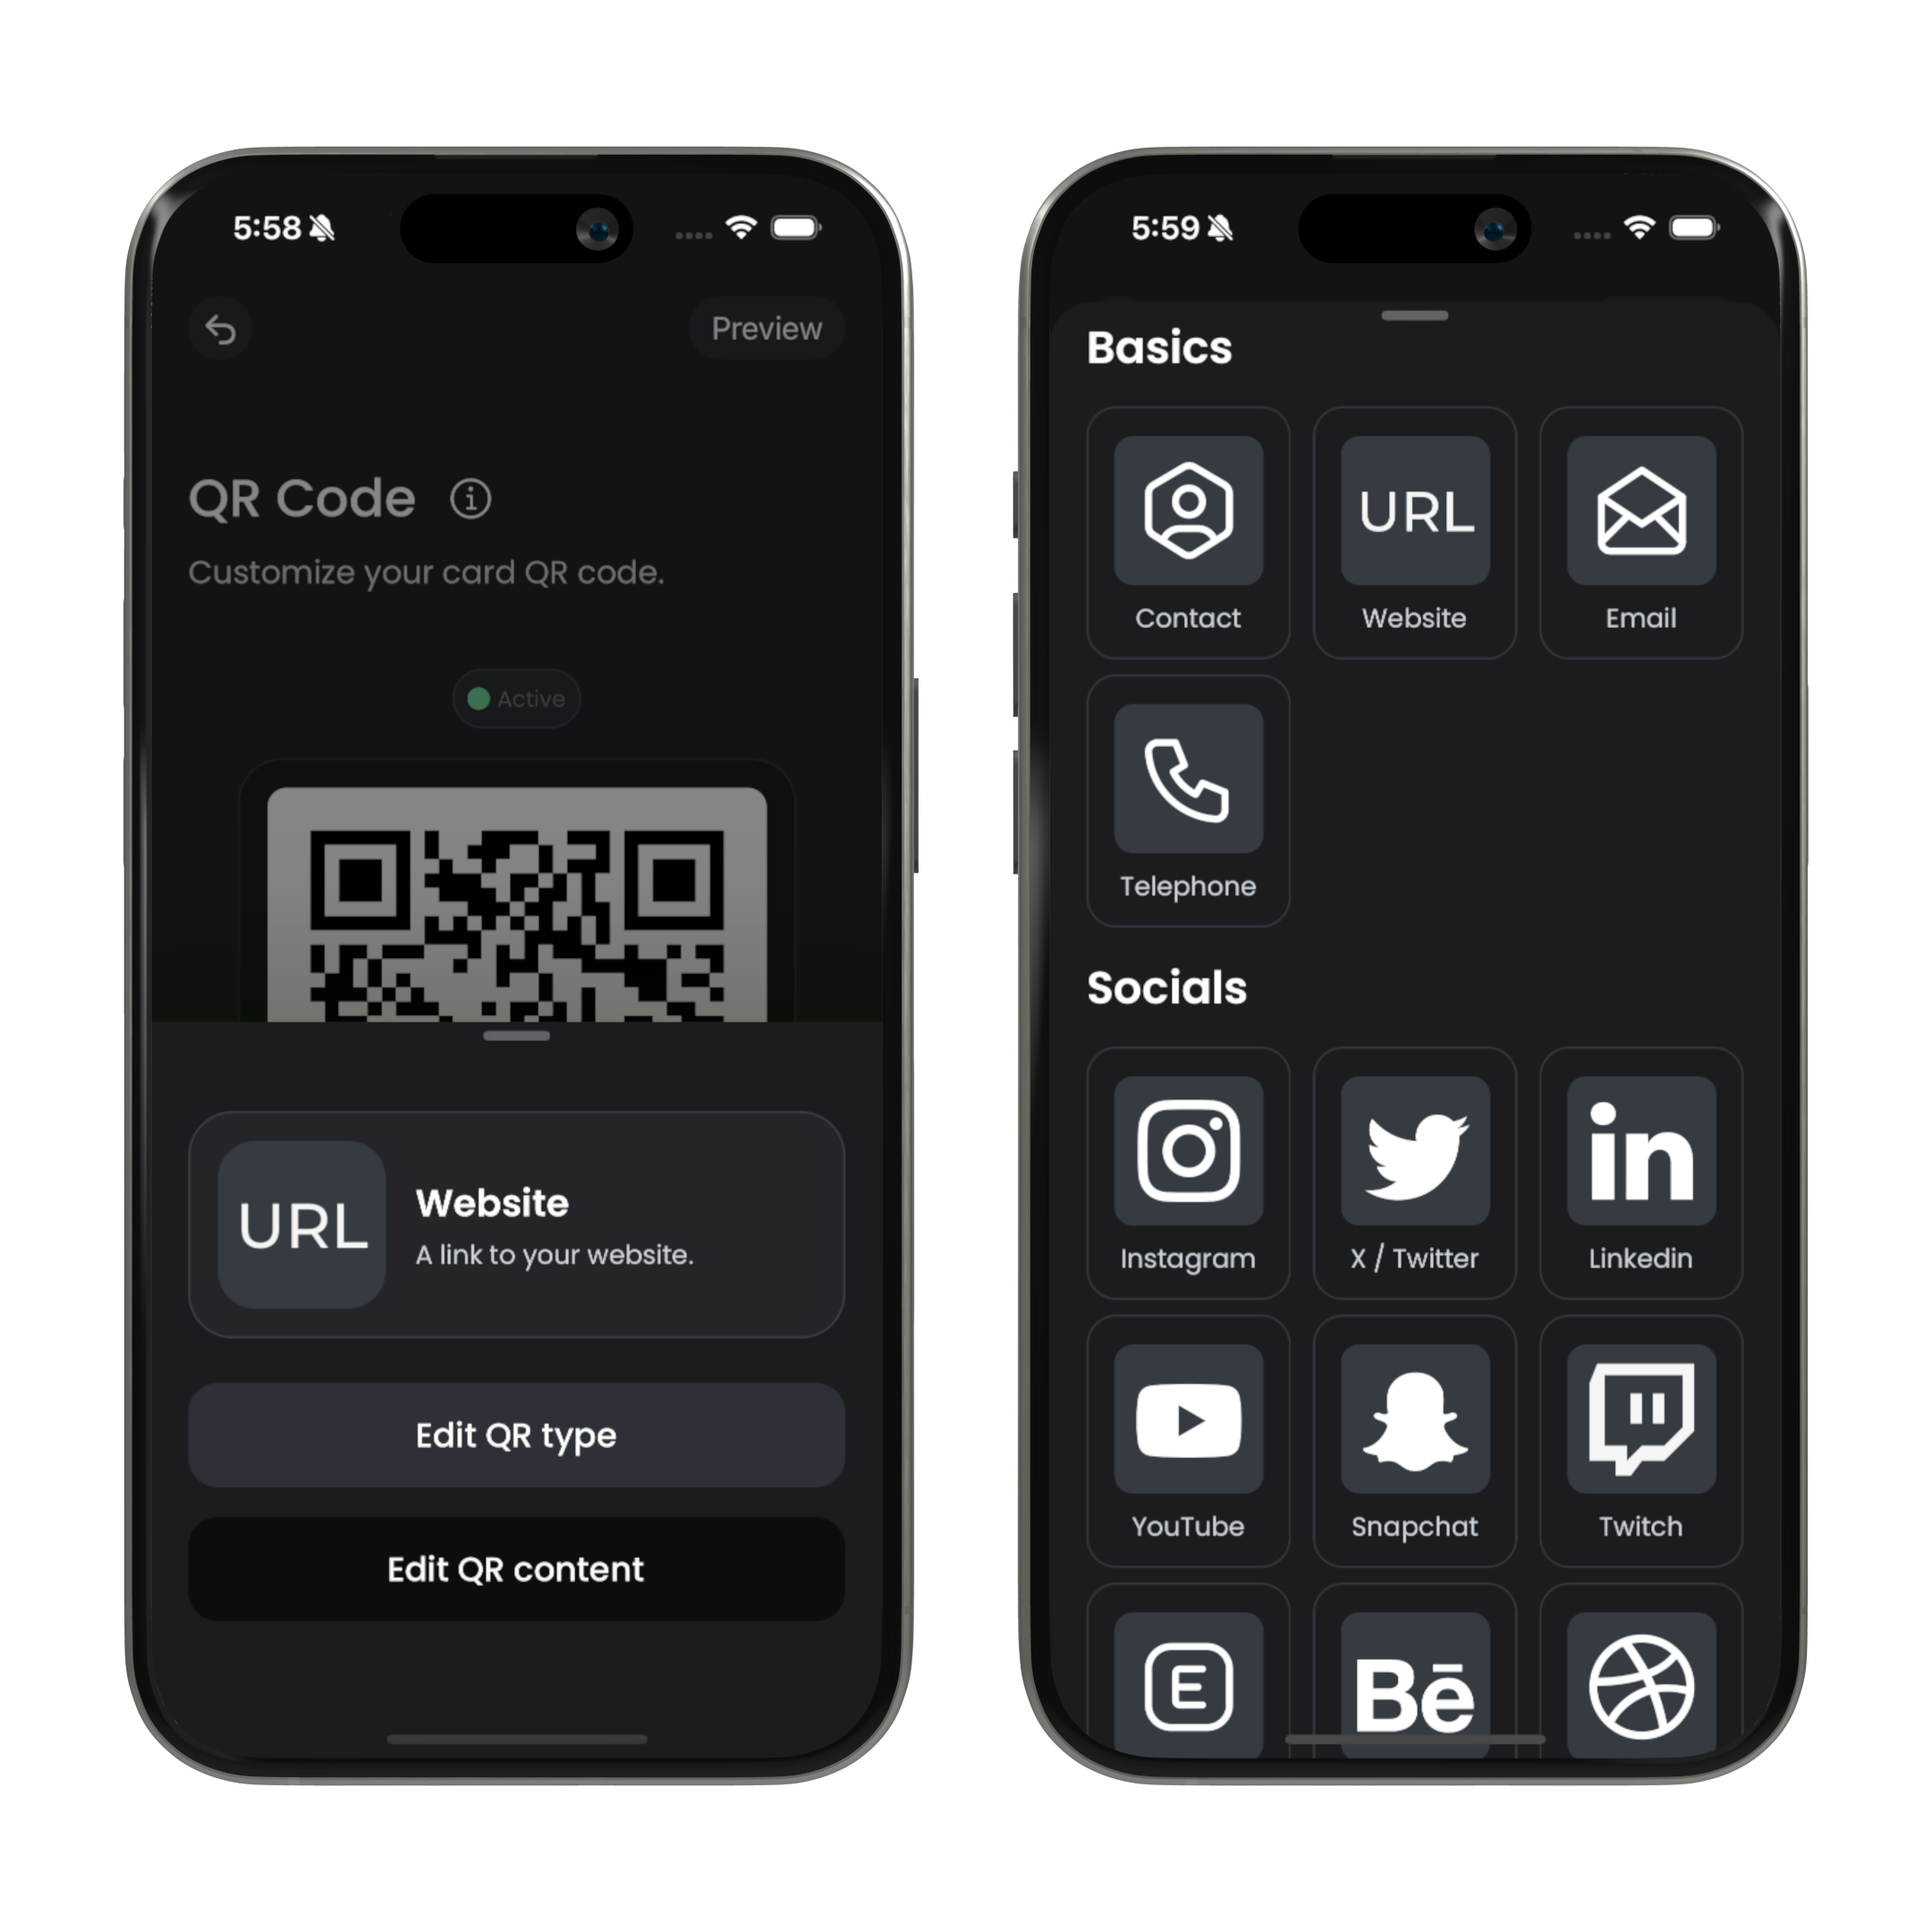
Step 4: Add a QR Code
- Pick a QR type: Select the Edit content button, and then click Edit QR type to open the link picker. The QR type specifies what type of information will be shared when someone scans your card. This is the main interaction element of your card!
- Add QR Data: Once you pick a QR type, a form will open, prompting you to add your QR data. If you've selected a contact type, add all your contact card fields.
Step 5: Finalize and publish
We're almost done!
- Name your card: Set a name and description for your new business card. These fields are just for your reference and won't be shared anywhere.
- Publish your card: Click the continue button, the click the Publish my card button to make your card ready to network.
Step 6: Add to Apple Wallet
Now, this is by far the coolest part!!
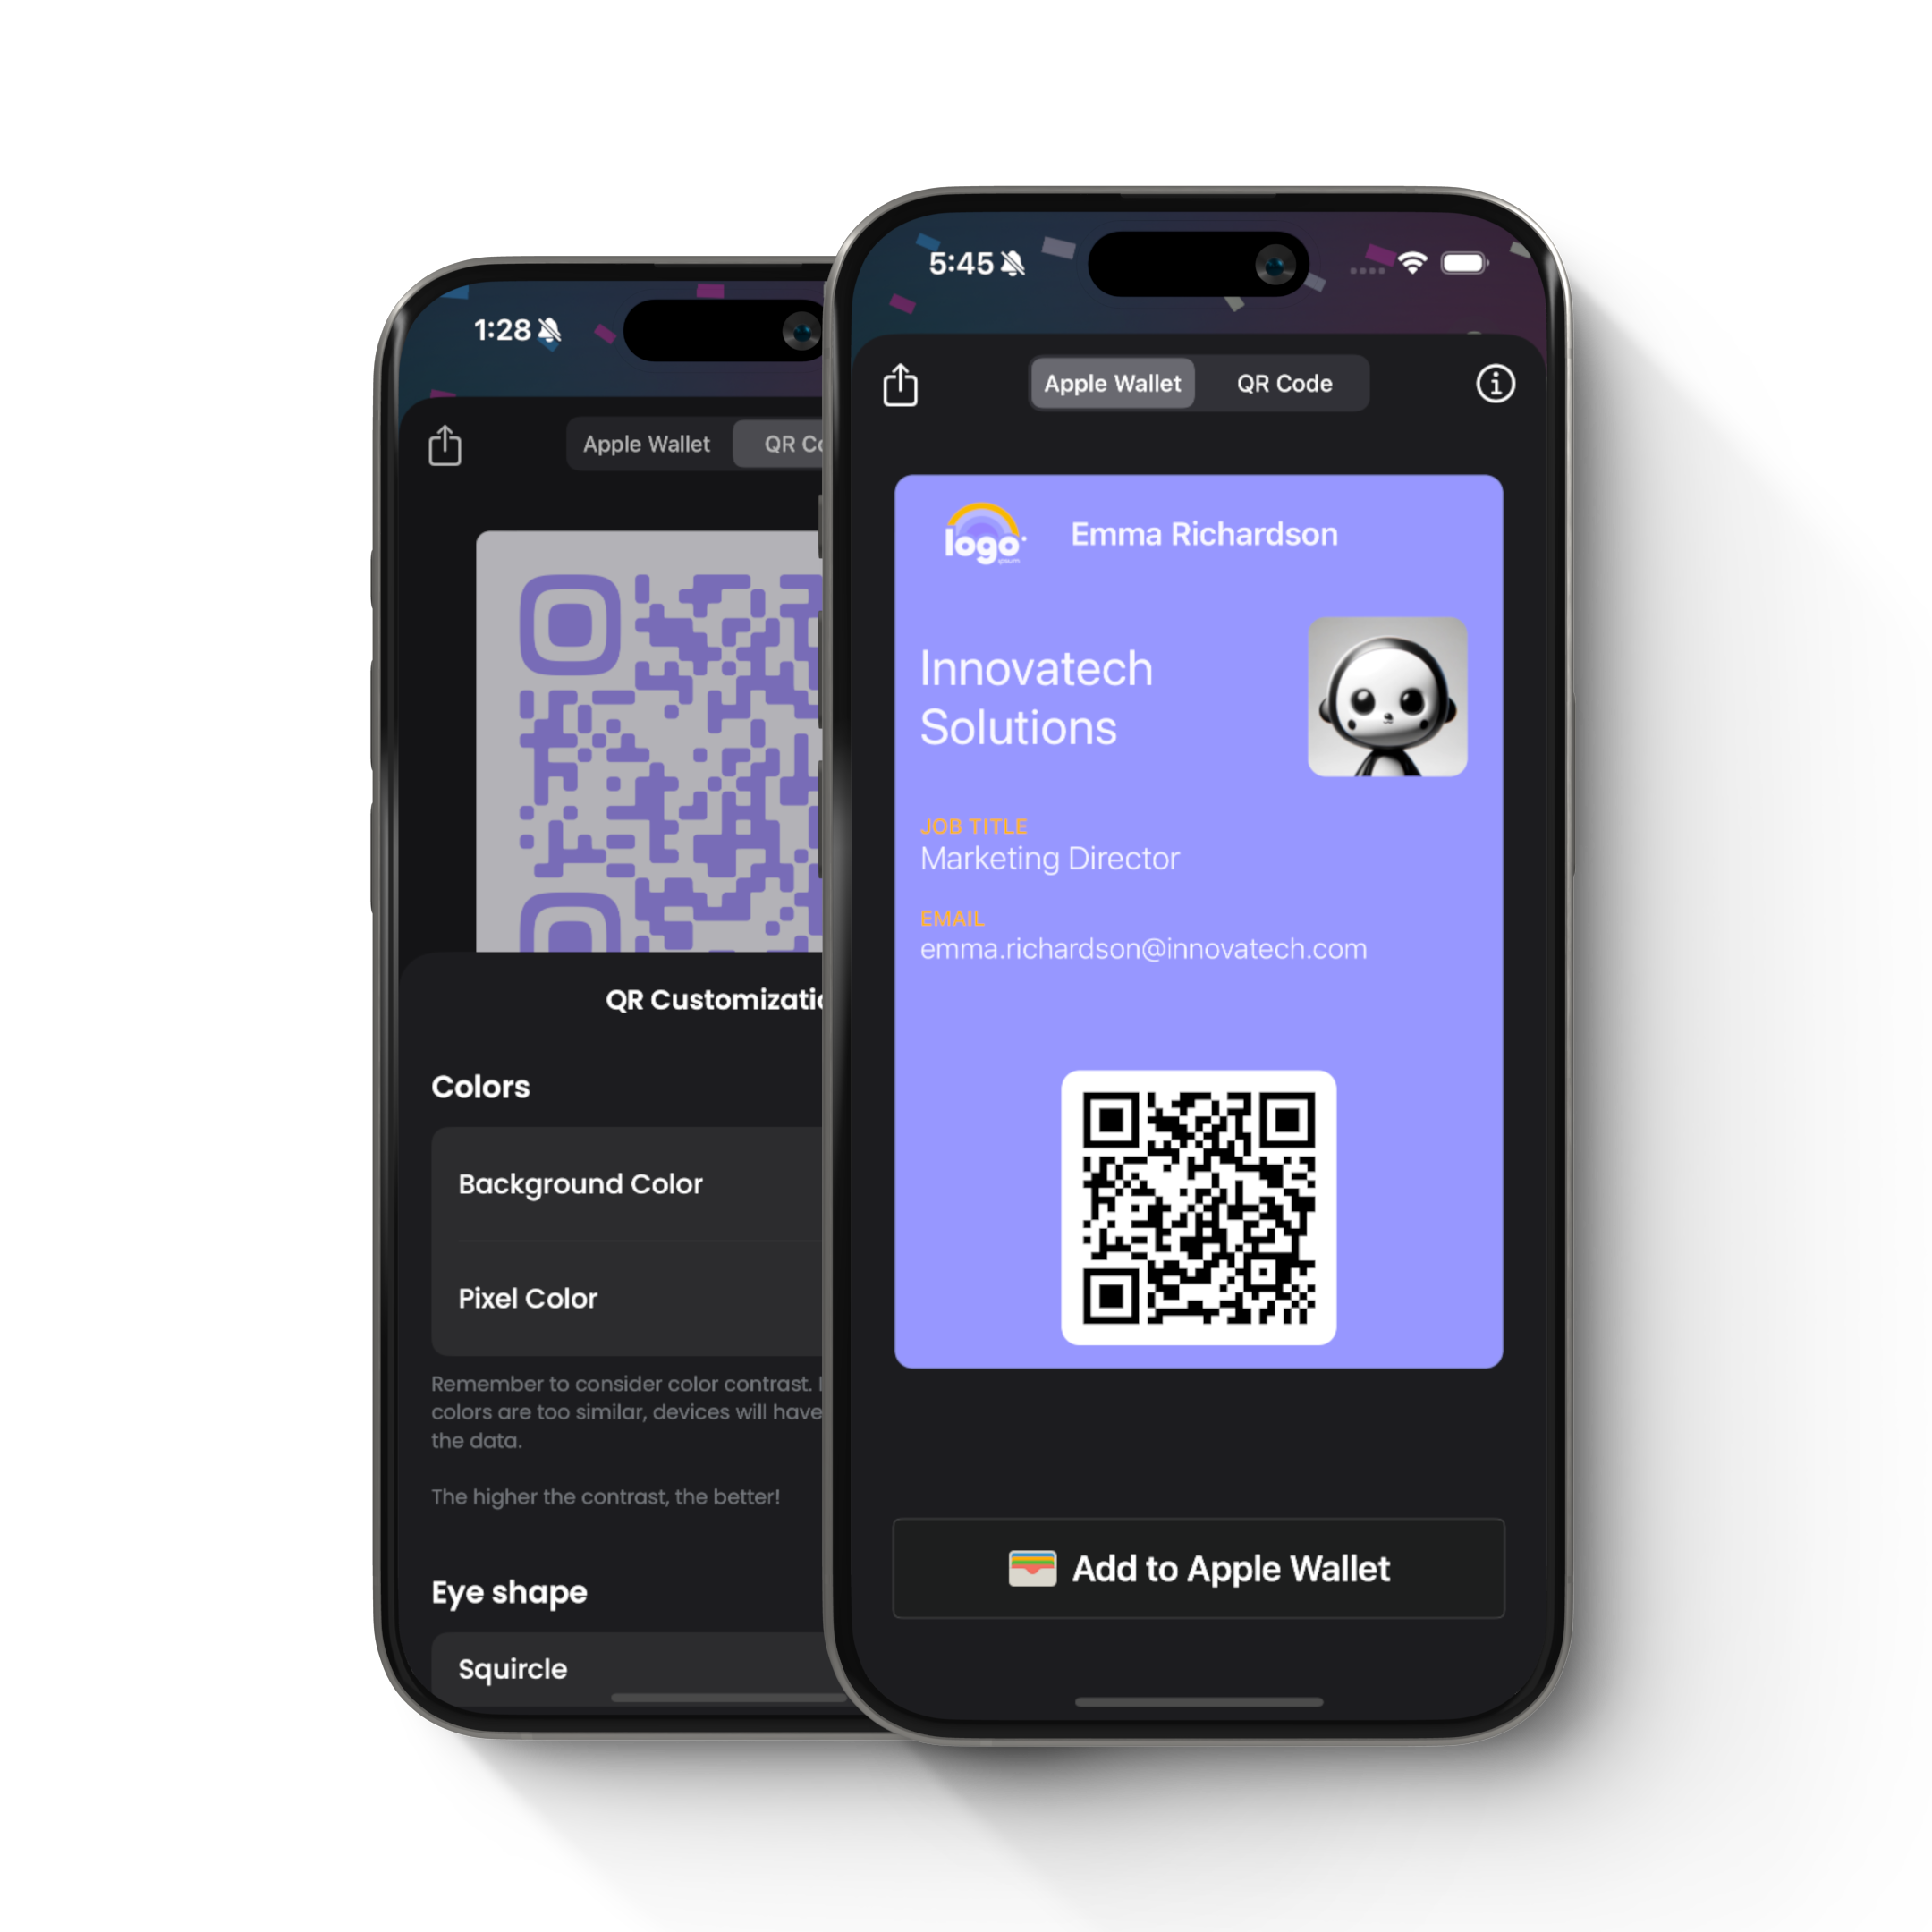
- Add to Wallet: Once your card looks perfect, tap the View My Card button. A preview of your card will appear with a button to Add to Apple Wallet, click it. Your digital business card will be saved directly to your Apple Wallet, ready for instant access.
- Quick Access: To make sure your card is always at your fingertips, at any time, you can access your business card from the lock screen of your iPhone by double tapping the lock button.
- QR Code: Along with the Wallet format, a QR code is made available so you can download and save it to your devices as a PNG to use as you wish.
Step 7: Start networking
That's it! You now have an electronic business card in your Apple Wallet. To use it, open your Wallet App and tap on your business card. When you share it with someone, have them scan the QR code. Their device will automatically parse the information and suggest the right action.
Team digital business cards
If you're looking to spice up the networking game of your entire organization, Social Card also offers a product tailored to help teams of all sizes introduce digital business cards into their work. You can learn more on the Social Card website or by email at hello@joinsocialcard.com.

